 Toyota Camry XV30 (2002–2006) Service ManualRear suspension
Shock absorber assy rear LH
Shock absorber assy rear LH
REPLACEMENT
HINT: COMPONENTS
-
REMOVE REAR WHEEL
-
REMOVE REAR SEAT CUSHION ASSY
-
REMOVE REAR SIDE SEAT BACK ASSY RH
-
REMOVE REAR SIDE SEAT BACK ASSY LH
HINT: Remove the LH side by the same procedures with the RH side.
-
REMOVE ROOF SIDE GARNISH INNER RH
-
REMOVE ROOF SIDE GARNISH INNER LH
HINT: Remove the LH side by the same procedures with the RH side.
-
REMOVE CENTER STOP LAMP ASSY
-
REMOVE PACKAGE TRAY TRIM PANEL ASSY
-
TMC made
-
TMMK made
9. REMOVE REAR SEAT 3 POINT TYPE BELT ASSY OUTER
-
TMC made:
-
TMMK made:
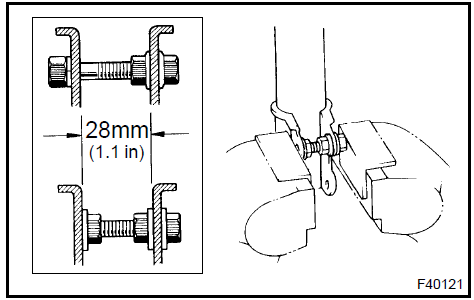
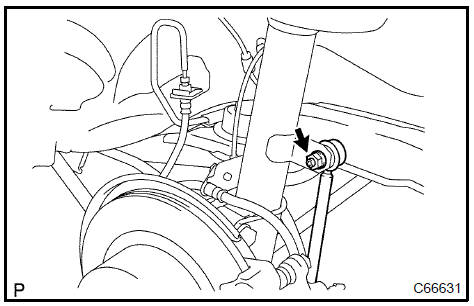
10. SEPARATE REAR STABILIZER LINK ASSY LH
a. Remove the nut and disconnect the stabilizer bar link from the shock absorber.
HINT: If the ball joint turns together with the nut, use a hexagon (5 mm) wrench to hold the stud.
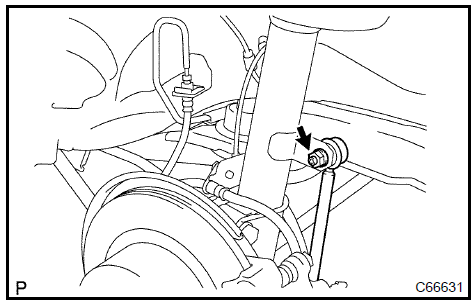 Separate rear stabilizer link assy LH
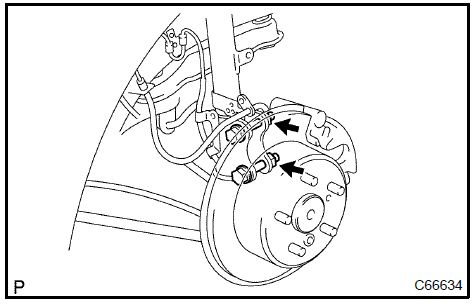
11. REMOVE REAR SHOCK ABSORBER WITH COIL SPRING
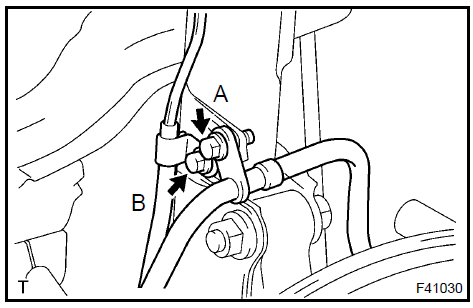
a. Remove the 2 bolts, disconnect the flexible hose and ABS speed sensor wire harness from shock absorber.

b. Loosen the 2 nuts on the lower side of the shock absorber.
HINT: Do not remove the 2 bolts.
-
Support the rear axle carrier with a jack.
-
Remove the rear suspension support No. 1 cover LH.
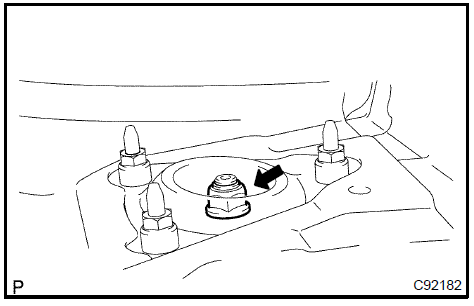
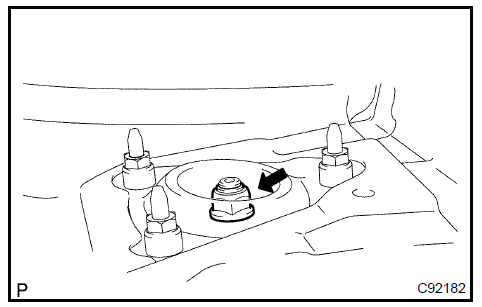
e. Loosen the suspension support center nut.
NOTICE: Do not remove the nut.
HINT: If not disassembling the rear shock absorber, it is not necessary to loosen the nut.
-
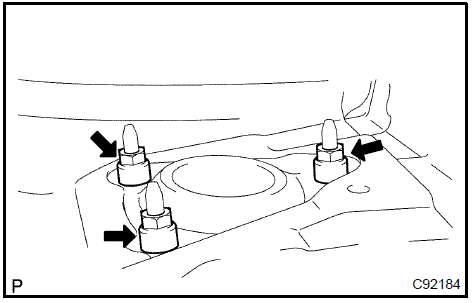
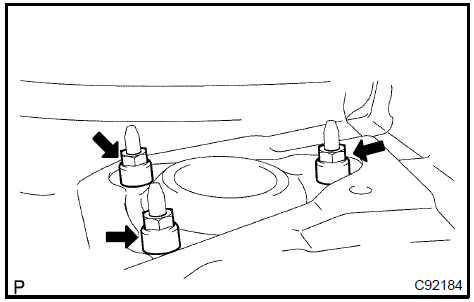
Remove the 3 nuts of the suspension support.
-
Lower the rear axle carrier and remove the 2 nuts and bolts on the lower side of the shock absorber.
-
Remove the shock absorber with the coil spring.
-
FIX REAR SHOCK ABSORBER WITH COIL SPRING
-
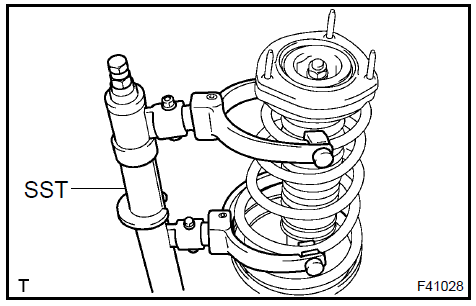
REMOVE SHOCK ABSORBER ASSY REAR LH
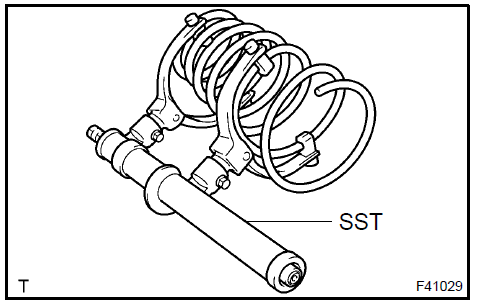
a. Install 2 nuts and a bolt to the bracket at the lower part of the shock absorber, and secure it in a vise.
b. Using SST, compress the coil spring.
SST 09727−30021
NOTICE: Do not use an impact wrench. It will damage the SST.
-
Remove the nut, collar and suspension support.
-
Remove the coil spring, spring bumper and lower insulator.
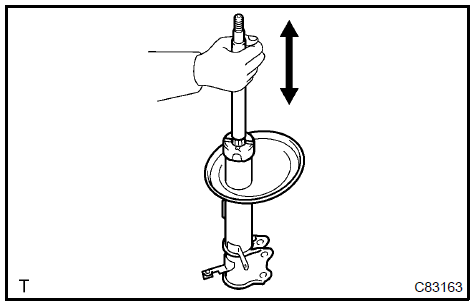
14. INSPECT SHOCK ABSORBER ASSY REAR LH
a. Compress and extend the shock absorber rod, and check that there is no abnormal resistance or unusual operation sound.
If there is any abnormality, replace the shock absorber with a new one.
NOTICE: When disposing the shock absorber, see DISPOSAL.
 Inspect shock absorber assy rear LH
15. INSTALL SHOCK ABSORBER ASSY REAR LH
-
Install the spring bumper.
-
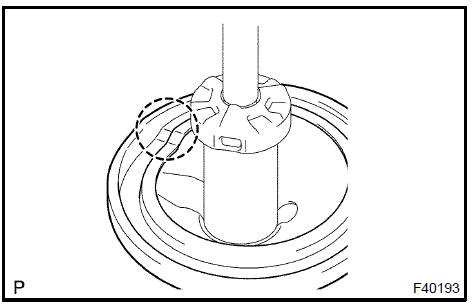
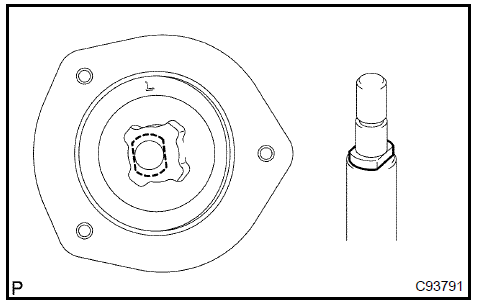
Install the lower insulator, as shown in the illustration.
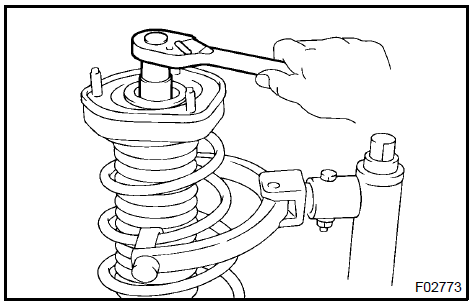
c. Using SST, compress the coil spring.
SST 09727−30021
NOTICE: Do not use an impact wrench. It will damage the SST.
d. Install the coil spring to the shock absorber.
HINT:
-
Fit the lower end of the coil spring into the gap of the lower seat.
-
Check that the 2 flat faces of the piston rod are positioned in parallel with the 2 flat faces of the rear suspension support.
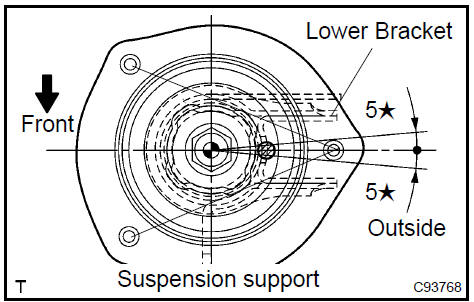
e. Align the suspension support with the shock absorber lower bracket, as shown in the illustration.
HINT: Set the suspension support so that the ribbed part of the suspension support faces out side.
-
Install the collar to the piston rod.
-
Temporarily install a new nut.
-
Remove the SST.
SST 09727−30021
HINT: After removing SST, recheck the direction of the suspension support.
16. INSTALL REAR SHOCK ABSORBER WITH COIL SPRING
a. Install the shock absorber with the coil spring and 3 nuts.
Torque: 39 N·m (400 kgf·cm, 29 ft·lbf)
b. Install the shock absorber with the coil spring, 2 bolts and nuts.
Torque: 255 N·m (2,600 kgf·cm, 188 ft·lbf)
HINT: Keep the bolt fixed while tightening the nut.
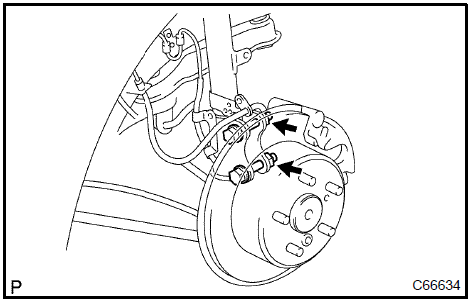
c. Install the flexible hose and ABS speed sensor wire harness with the 2 bolts.
Torque: A: Flexible hose: 19 N·m (194 kgf·cm, 14 ft·lbf) B: ABS speed sensor wire harness: 5.5 N·m (56 kgf·cm, 49 inVlbf)
d. Tighten the nut in the center of suspension support.
Torque: 49 N·m (500 kgf·cm, 36 ft·lbf)
HINT: If the shock absorber has not been disassembled, it is necessary to torque the nut.
e. Install the rear suspension support No. 1cover LH.
17. INSTALL REAR STABILIZER LINK ASSY LH
a. Install the stabilizer bar link to the shock absorber with the nut.
Torque: 39 N·m (400 kgf·cm, 29 ft·lbf)
HINT: If the ball joint turns together with the nut, use a hexagon (5 mm) wrench to hold the stud.
 Install rear stabilizer link assy LH
18. INSTALL REAR SEAT 3 POINT TYPE BELT ASSY OUTER
-
TMC made
-
TMMK made
-
INSTALL REAR SIDE SEAT BACK ASSY RH
-
INSTALL REAR SIDE SEAT BACK ASSY LH
HINT: Install the LH side by the same procedures with the RH side.
-
INSTALL REAR WHEEL Torque: 103 N·m (1,050 kgf·cm, 76 ft·lbf)
-
INSPECT REAR WHEEL ALIGNMENT
Rear suspension system
Rear suspension arm assy No.1 LH
Rear suspension arm assy No.2 LH
Stabilizer bar rear
Strut rod assy rear
Rear suspension
Rear wheel alignment
Shock absorber assy rear LH
Shock absorber assy rear LH
Toyota Camry XV30 (2002–2006) Service Manual
- Introduction
- Audio & visual system
- Automatic transmission / trans
- Brake
- Clutch
- Communication system
- Cooling
- Cruise control
- Drive shaft / propeller shaft
- Emission control
- Engine control system
- Engine hood/door
- Engine mechanical
- Exhaust
- Exterior/interior trim
- Front suspension
- Fuel
- Heater & air conditioner
- Ignition
- Instrument panel/meter
- Intake
- Lighting
- Lubrication
- Manual transmission/transaxle
- Parking brake
- Power steering
- Rear suspension
- Seat
- Service specifications
- Sliding roof/convertible
- Starting & charging
- Steering column
- Supplemental restraint system
- Theft deterrent & door lock
- Tire & wheel
- Windshield/windowglass/mirror
- Wiper & washer
- Wiring
Categories
