 Toyota Camry XV30 (2002–2006) Service ManualBrake
Brake master cylinder sub-assy
Brake master cylinder sub-assy
OVERHAUL
1. DRAIN BRAKE FLUID
NOTICE: Wash off the brake fluid immediately if it comes into contact with a painted surface.
-
REMOVE AIR CLEANER ASSY
-
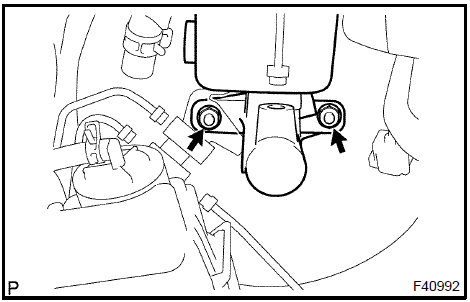
REMOVE BRAKE MASTER CYLINDER SUB−ASSY
-
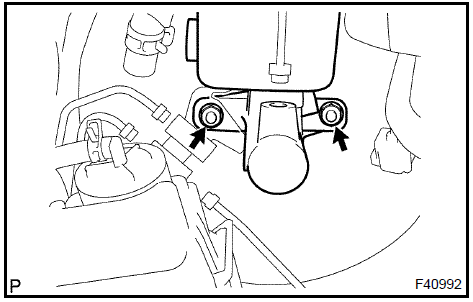
Disconnect the level warning switch connector.
-
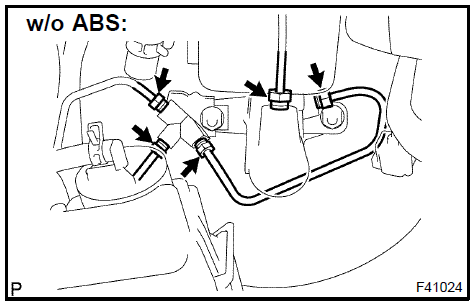
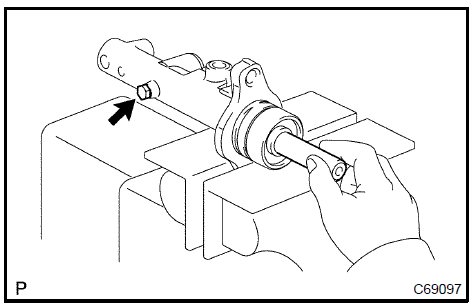
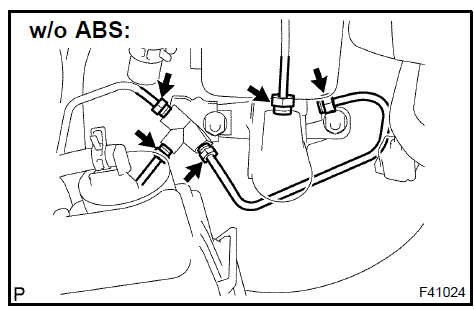
w/o ABS: Using SST, disconnect the 5 brake tubes from the brake master cylinder.
SST 09023−00101
-
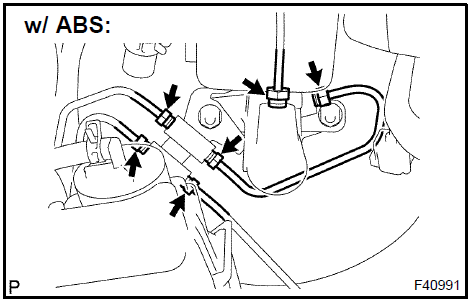
w/ ABS: Using SST, disconnect the 6 brake tubes from the brake master cylinder.
SST 09023−00101
-
w/o ABS: Remove the 2 nuts, pull out the 3−way and brake master cylinder sub−assy.
-
w/ ABS: Remove the 2 nuts, pull out the 2−way and brake master cylinder sub−assy.
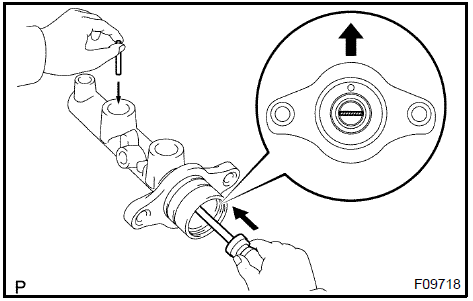
4. REMOVE BRAKE MASTER CYLINDER RESERVOIR FILLER CAP ASSY
-
Pull out the master cylinder reservoir filler cap assy.
5. REMOVE BRAKE MASTER CYLINDER RESERVOIR STRAINER
-
Pull out the master cylinder reservoir strainer.
6. REMOVE BRAKE MASTER CYLINDER RESERVOIR SUB−ASSY
-
Remove the screw and pull out the master cylinder reservoir sub−assy.
7. REMOVE MASTER CYLINDER RESERVOIR GROMMET
-
Remove the 2 master cylinder reservoir grommets.
8. REMOVE BRAKE MASTER CYLINDER KIT (W/O VSC)
-
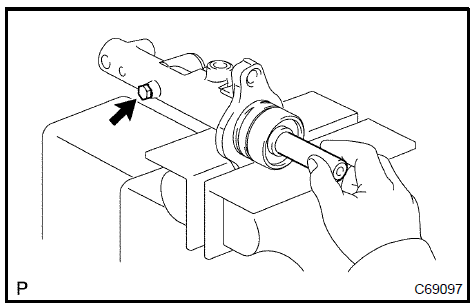
Place master cylinder in vise.
-
Remove the O−ring.
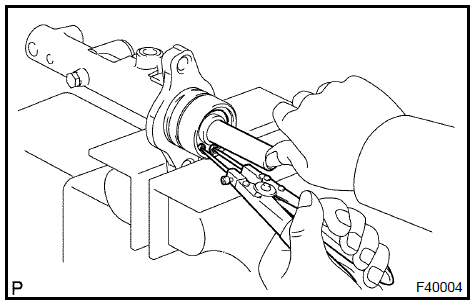
-
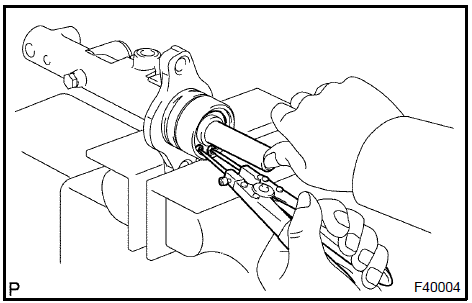
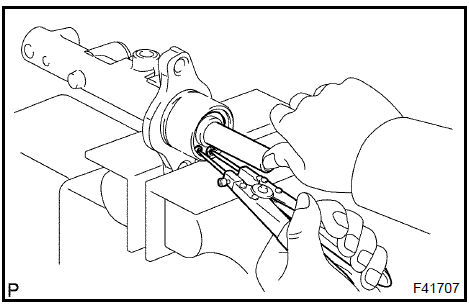
Push in the piston and remove the snap ring with snap ring pliers.
-
Push in the piston and remove the piston stopper bolt and gasket.
-
Remove the No.1 piston sub−assy, pulling straight out not at an angle.
NOTICE: If pulled out at an angle, there is a possibility that the cylinder bore could be damaged.
-
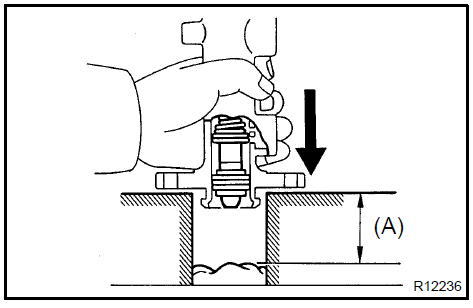
Place a waste cloth and 2 wooden blocks on the work table and lightly edges until the No.2 piston sub−assy drops out of the cylinder.
HINT: Make sure the distance a from the rag the top of the blocks is at least 100 mm (3.94 in.).
NOTICE: If pulled out at an angle, there is a possibility that the cylinder bore could be damaged.
9. REMOVE BRAKE MASTER CYLINDER KIT (W/ VSC)
-
Place master cylinder in vise.
-
Remove the O−ring.
-
Push in the piston and remove the snap ring with snap ring pliers.
NOTICE: If pulled out at an angle, there is a possibility that the cylinder bore could be damaged.
-
Push in the piston with a screwdriver, and remove the straight pin by turning over the cylinder body.
HINT: Tape the screwdriver tip before use.
-
Remove the No.1 and No.2 piston sub−assy and 2 springs by hand, pulling straight out, not at an angle.
10. INSPECT MASTER CYLINDER BODY
-
Check the cylinder bore for rust or scoring.
11. INSTALL BRAKE MASTER CYLINDER KIT (W/O VSC)
-
Place master cylinder in vise.
-
Apply the lithium soap base grycol grease on new No.1 and No.2 piston sub−assy.
-
Install the No.2 and No.1 piston sub−assy.
NOTICE:
-
If the piston is inserted at an angle, there is a possibility that the cylinder bore could be damaged.
-
Be careful not to damage the rubber lips on the pistons.
-
Push in the piston and install a new gasket and a new piston stopper bolt.
Torque: 10 N·m (100 kgf·cm, 7 ft·lbf)
-
Push in the piston and install the snap ring with snap ring pliers.
-
Apply the lithium soap base grycol grease on a new O− ring and install the O−ring to the master cylinder.
12. INSTALL BRAKE MASTER CYLINDER KIT (W/ VSC)
-
Place master cylinder in vise.
-
Apply the lithium soap base glycol grease on new No.1 and No.2 piston sub−assy.
-
Install the No.2 and No.1 piston sub−assy.
NOTICE:
-
If the piston is inserted at an angle, there is a possibility that the cylinder bore could be damaged.
-
Be careful not to damage the rubber lips on the pistons.
-
Install the straight pin.
HINT: Insert the No.2 piston with the groove positioning horizontally.
-
Push in the piston and install the snap ring with snap ring pliers.
-
Apply the lithium soap base glycol grease on a new O− ring and install the O−ring to the master cylinder.

13. INSTALL MASTER CYLINDER RESERVOIR GROMMET
-
Apply the lithium soap base glycol grease on the 2 master cylinder reservoir grommets.
-
Install the 2 master cylinder reservoir grommets to the master cylinder reservoir sub−assy.
14. INSTALL BRAKE MASTER CYLINDER RESERVOIR SUB−ASSY
-
Install the master cylinder reservoir sub−assy to the master cylinder with the screw.
15. INSTALL BRAKE MASTER CYLINDER RESERVOIR STRAINER
-
Install the brake master cylinder reservoir strainer.
16. INSTALL BRAKE MASTER CYLINDER RESERVOIR FILLER CAP ASSY
-
Install the brake master cylinder reservoir filler cap assy.
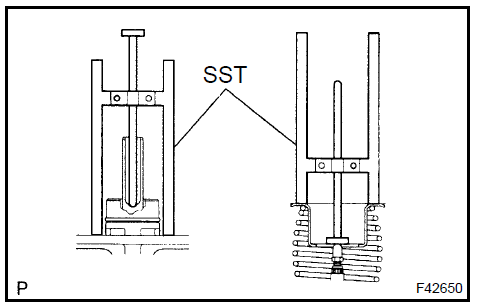
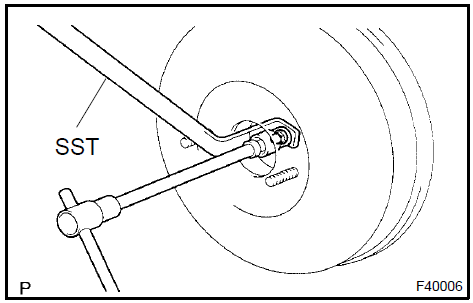
17. INSPECT AND ADJUST BRAKE BOOSTER PUSH ROD
-
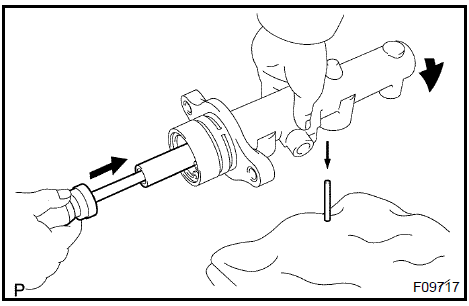
Apply SST to the master cylinder.
SST 09737−00013
-
Set SST, on the master cylinder, lower the pin of the SST until it slightly touches the piston.
-
Apply the chalk to the flat surfaced tip of the SST pin.
-
Turn SST upside down and place it clearance between the brake booster and SST.
Clearance: 0 mm (0 in.)
HINT:
-
If there is a clearance between the SST main body and the booster shell. It means that the specified value, and no chalk attachment on the booster push rod means that it is more than the specified value.
-
Brake booster push rod clearance before shipment is adjusted to be 0.105 mm ( 0.004 in.).
-
Using SST, adjust the booster push rod length until the push rod lightly touches the pin head.
SST 09737−00020
18. INSTALL BRAKE MASTER CYLINDER SUB−ASSY
-
w/o ABS: Install the master cylinder sub−assy and 3−way with the 2 nuts.
Torque: 13 N·m (130 kgf·cm, 9 ft·lbf)
-
w/ ABS: Install the master cylinder sub−assy and 2−way with the 2 nuts.
Torque: 13 N·m (130 kgf·cm, 9 ft·lbf)
-
w/o ABS: Using SST and connect the 5 brake tubes to the master cylinder sub−assy.
SST 09023−00101 Torque: 15 N·m (155 kgf·cm, 11 ft·lbf)
-
w/ ABS: Using SST and connect the 6 brake tubes to the master cylinder sub−assy.
SST 09023−00101
Torque: 15 N·m (155 kgf·cm, 11 ft·lbf) -
Connect the level warning switch connector.

-
FILL RESERVOIR WITH BRAKE FLUID
-
BLEED MASTER CYLINDER
SST 09023−00101
-
BLEED BRAKE LINE
-
INSTALL AIR CLEANER ASSY
-
CHECK FLUID LEVEL IN RESERVOIR
-
CHECK BRAKE FLUID LEAKAGE
Brake system
Brake pedal support assy
Accelerator & brake pedal assy
Brake system
Brake master cylinder sub-assy
Brake booster assy
Front brake
Brake fluid
Rear disc brake
Rear drum brake
Brake actuator assy (W/O VSC)
Brake actuator assy (W/ VSC)
Speed front LH
Skid control
Yawrate
Steering
Adjustable pedal switch
Adjustable pedal relay
Brake pedal support assy
Toyota Camry XV30 (2002–2006) Service Manual
- Introduction
- Audio & visual system
- Automatic transmission / trans
- Brake
- Clutch
- Communication system
- Cooling
- Cruise control
- Drive shaft / propeller shaft
- Emission control
- Engine control system
- Engine hood/door
- Engine mechanical
- Exhaust
- Exterior/interior trim
- Front suspension
- Fuel
- Heater & air conditioner
- Ignition
- Instrument panel/meter
- Intake
- Lighting
- Lubrication
- Manual transmission/transaxle
- Parking brake
- Power steering
- Rear suspension
- Seat
- Service specifications
- Sliding roof/convertible
- Starting & charging
- Steering column
- Supplemental restraint system
- Theft deterrent & door lock
- Tire & wheel
- Windshield/windowglass/mirror
- Wiper & washer
- Wiring
Categories
